Getting started with Azure Kubernetes Series — Part 3
Hi Friends,
This is the continuation of the Azure Kubernetes series. In this section, we will see container orchestration using Kubernetes and miniKube. Minikube is basically scaled down version of Kubernetes. MiniKube works with same set of objects on single node cluster. This way we will be able to do everything locally on laptop with cluster. In this section, we will look couple of things
- Deploying Multi container Apps
- Scale Containerized apps
- Roll-out new versions without having downtime
- It also provides networking, storage and service discovery
- Manage resources across multiple containers
- Self starting
Hence, sit back, relax and let’s get started.

Currently, Kubernetes is very popular in the market. Almost all cloud providers are having support for this. There is one provided by docker also docker swarm.
Kubernetes installation steps:- https://kubernetes.io/docs/tasks/tools/install-kubectl/#install-kubectl-on-windows

For the server side, let’s say to replicate on the local machine, we can either choose
- minikube
- Docker-For-Desktop
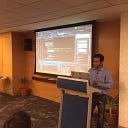
I will go ahead with the 2nd option as its very easy to setup, since I am already running Docker on my machine. Here, I will come to Docker settings page and just enable kubernetes as shown below.

Last two checkbox you can decide to choose or not. I usually prefer more to have them selected for more detailed output.
So now, let’s understand what is kubernetes?
Its Open-source system for automating deployment, scaling, and management of containerized application across clusters of machines. Its management of containerized applications. Its not managing clusters as such. In simple words, its really a tool which manages an application which runs on the cluster. So, if you have the cluster, you still need the regular management tool of clusters. But, to manage the applications on the cluster, you will use kubernetes.
It has a set of basic things like
- Namespace
- Pod
- Volume
- Service
We can have namespaces, within physical cluster. This is for logical separation. Like we can have namespace for dev, QA, stage, etc.
Pod is the simplest unit of deployment. It basically maps to your container. As a best practice, we should be having one container to one pod. However, it does support multiple containers on the same pod as well.
Volume is the way in which you manage state of your data. Basically, volume is used for stateful persistence.
Service, will explain later in the post. Apart from these basic things, we do have controllers as well. They are
- ReplicaSet
- Deployment
- StatefulSet
- DemonSet
When we want to have multiple replicas of the container, then we will be creating ReplicaSet.
Deployment, once you define a template for deploying your applications
StatefulSet comes into action, when we want to deal with stateful states. This gets used mainly with database containers.
DemonSet acts like demon unix boxes. If you want to collect metric from each of the containers which are running, we can define DemonSet. It runs inside the container.

Whenever, pod gets created. it creates its own ip. It can be group of containers. It contains specification how to run a container.
Next one is deployment. Deployment is like a template file. In deployment, we define what is the desired state, we can define things like
- which version of the container image
- number of replicas
- update strategy
- Metadata to interact with resources
Here, first I will be creating kubectl namespace with the below command

Now, we need to apply the same with apply command.

Here, my folder structure currently looks like

Best part with kubectl, that I can apply on file, files or to complete folders at once. Let me go ahead and do that. Now, let’s have a look at the file.
Above is the sample deployment file. Let’s understand the same
- It starts with version name
- Then comes kind, where in I am mentioning its Development
- Next, comes metdata section, where in it takes name, namespace and labels. Under labels, we are specifying run section.
- We then define the template and within the template we have spec which has key-value pairs.
- spec starts with container, which contains its name, image, environment variables. For instance, here we gave ASPNETCORE_ENVIRONMENT and value development.
- Next, comes port. And its container port which is running on port 80.
- Protocol is TCP only.
- imagePullPolicy, I set it to IfNotPresent.
- restartPolicy: Always.
Like these, there are many other settings one can set. Entire schema definition and usage can be referred at https://kubernetes.io/docs/home/.
Now, I can go ahead apply the same to web-deployment.yml file like shown below.

Therefore, at this instant it started the container on the single node cluster. I can get the description of this using kubectl describe deployment aksweb — namespace aks-learning.

Its like deployment is done and is running. Now, to access this deployment, I need to expose the service. Now, let’s look at the service definition.
Under service section, kind is Service here. Afterwards, I have metadata again. Each kubernetes object will have its own metadata. It has its spec related. Here I am using type as nodePort. This will changed with loadBalanacer, when we will be deploying the same on azure. nodePort assigns a port to the service on each and every node of the cluster. port here is internal port, which we are using from the container. So, my deployment file is exposing port 80 and I am mapping the same port and exposing it outside. And, then the selector. selector is the webfront-deployment. This I can use to query the service definition from outside. Also, this is tied with the definition in web-deployment file run section. Therefore, this is how the service links itself to the deployment.
Deployment is physical deployment like deploying the files on IIS but you still need a way to expose the same as url. Therefore, that work in kubernetes is done by service.

Similarly, I have api-deployment.yml
This has all the things same except initContainer. Here, before my actual api container starts, I have some dependency on sql server and I need to initialize the db before the api starts communicating with db. This I can do as initialization part of the initContainer. And, here I am using sqlclient image and then I am initializing the same with initialize-db script. Here, I am running this script as part of initialization process.
Dashboard creation:-
For dashboard creation. Please have a look at this url http://collabnix.com/kubernetes-dashboard-on-docker-desktop-for-windows-2-0-0-3-in-2-minutes/

Then,

click on http://localhost:8001/api/v1/namespaces/kube-system/services/https:kubernetes-dashboard:/proxy/

Now, the below command


We need to select the config file from our users profile under .kube directory.

Now, we will sign-in. It will land in below portal.

Here, you can see all details related to your containers in this dashboard. Now, let’s look at db template.
Here, most of the things are almost same. Only thing which I have changed here is kind value to StatefulSet. StatefulSet, we use for any db transactions where in, we need to persist state. Similarly, we have another yml file for maintaining password. This kind of approach is very useful with devops team.
Finally, we have service to expose the same like shown below.
Now, I can go ahead, create and apply the same in kubectl.

Similarly,

and

Now, we need to apply the same

At high level, we will start three containers one for web, one for api and last one for database.

Service is like stable endpoint. It provides load balancing capabilities. In this section, let’s say, I have two instances of API running means I have replica factor of 2 which means its running on node 1 and node 2. My web application can talk to it by using service discovery mechanism of kubernetes. And it gives, AKS-API as service. That means I don’t have to really point to node 1 or node 2. Its like the load-balancer, which we have on normal web servers. Only difference here is, its software defined load balancer.
It also provides stable IP. Let’s say we have 4–5 different machines or physical nodes in our cluster and because of the restart or upgrade let’s say one of the nodes is getting upgraded, then in that case, web application can still talk to one of these services because of internal service discovery mechanism.
StatefulSets usage:-
- Use this, when data loss is unacceptable.
- In case of pod or cluster crash data loss doesn’t happen.
- This is mostly used when deploying database workloads.
We can see the dashboard like this. Although, steps I have already explained above.

Here, I am seeing workload status against my namespace. It gives me very fine grained control over cluster like it tells me if anything is happening on the cluster. I can drill down further like this

This is the same portal, which we will get when we will run full fledged kubernetes. Like you can see also that all my services are also working fine.

With this, let’s wrap this session. We will continue the same in the coming session.
Thanks,
Rahul Sahay